Monday, April 6, 2015

Odds and Ends, and a photoshoot

I tend to procrastinate when it comes to mundane, time-consuming tasks; and as such, completing the wiring on the MVRy. layout keeps getting bumped to the bottom of my "to do" list.

With a lengthy day off ahead of me, I decided to tackle the task head-on and put it behind me. I dropped all the remaining feeders, cut the module rail gaps (so that the two halves can be functionally separated, and cleaned up my solder joints.


My Peco power-routing turnouts have been giving me some trouble lately in terms of routing the power through the frog. After doing some research, I discovered that relying solely on the point friction to transfer power through the turnout is a sketchy game at best; better to solder a wire to the frog, and use a routing switch (like a SPDT switch) to route the power.

I dropped wires and soldered in the feeders, placing each feeder on the opposite side of the viewing angle to best disguise them.


Small SPDT switches will be installed next to the throwbars, then shaped and detailed to look like scale switch stands. More on that later.

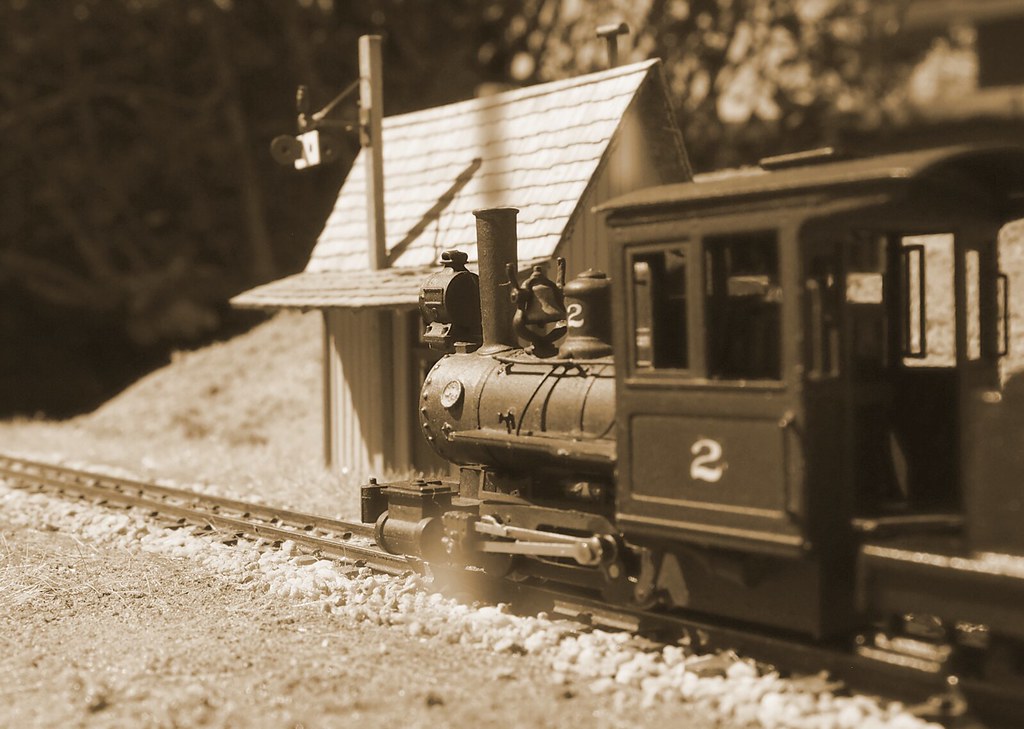
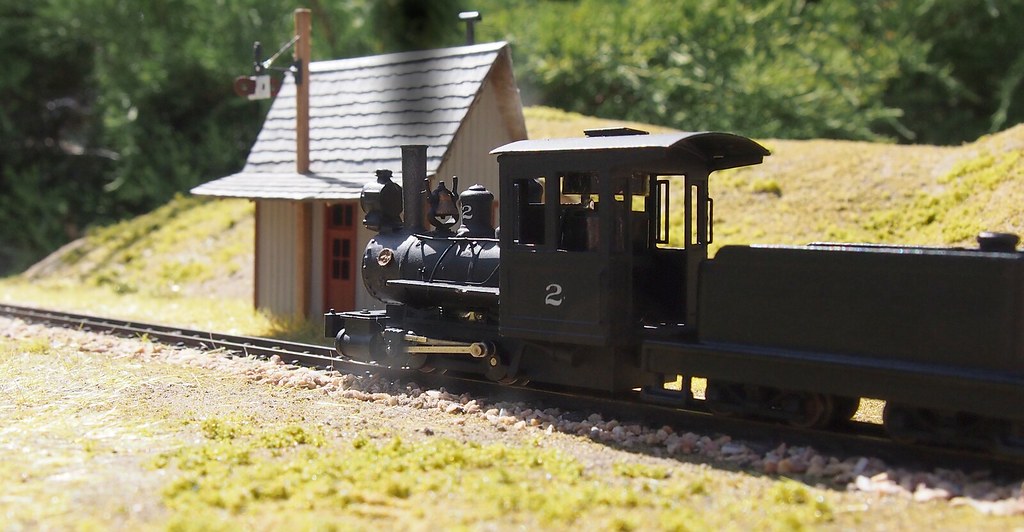
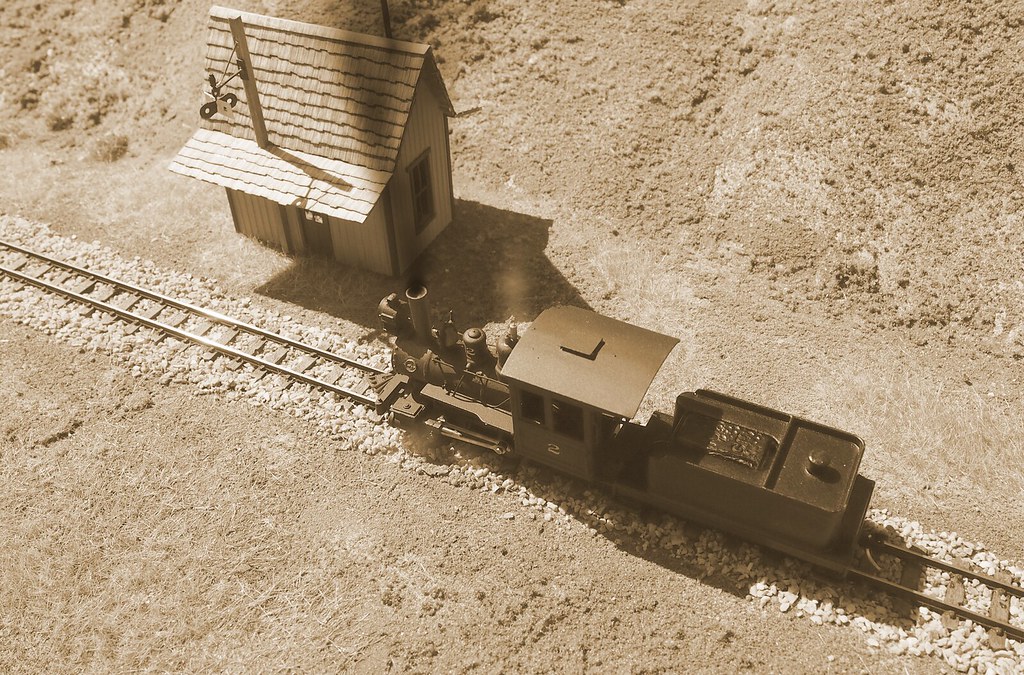
I finished the Shapeways tender for #2 (with the exception of decals, a coal load, and weathering), and ran it on the layout for a bit.


 It was a nice, sunny day, so I decided to take the test module out and take a few "beauty shots." Really happy with how these came out.


There are a bunch more, but these were some fun picks. I like the effect of the sepia tone on the scene.

More fun and frolic to come, folks! See you soon.


Thursday, April 2, 2015

More progress on the Cafe

Making more progress on the Cafe. I decided to do a base stain of India Ink and Alcohol, followed by a thinned wash/drybrush of white acrylic to simulate a weather-worn whitewash. The trim was drybrushed a light cornflower blue.


You can see in the last shot the raw India Ink stain, as I figured the back of the false-front facade wouldn't have been painted.

I installed the roof and dry-fitted the windows. I also began applying the Bar Mills shingles, which look very convincing.


I decided to enlarge the opening for the front door to accommodate a taller door with a transom window above it. The door will be painted white, with the light blue trim.


Getting close to finished on this build. What's left?

-Paint and install the front door
-Finish shingles
-Fabricate and install kitchen smoke-jack
-Fabricate and install Cafe sign
-Fabricate and install front porch awning and boardwalk

This has been a good ramp-up project to get myself excited about completing the structures on the layout. I also have to tackle the Hotel, a small water-tower, and decide which direction I'd like to go on the industrial spur near the depot.

Wednesday, March 18, 2015

Cafe Construction, Pt. 2

More progress on the cafe today.

Additional interior bracing was added from 1/8" square basswood stock.


Assembled the adjoining walls in pairs.


I stole...ahem..."borrowed" some of my son's Legos to use as a squaring jig.


Starting to look like an actual structure!


While the glue was setting up, I decided to take a few trial runs at the type of wood stain I will be using to simulate "aged" wood. The Cafe will be whitewashed, but I'd like a base look of grey/weathered wood underneath to create a layered weathering effect.

My usual standby is an India Ink/Alcohol mix; it turned out rather light grey, and warped the wood to boot.


I also tried various shadings of acrylic Grimy Black diluted with water, as well as some oil-mixable Payne's Grey (which was a little too blue for my tastes). There was a certain amount of warpage with these as well.


However, after letting them sit for a while, things tended to even back out again.


With the amount of bracing on my structure, I think that I won't encounter too much warping, especially if I am careful to apply and wipe off the finish quickly.

I like the tone of the India Ink wash, but I think it's too "even." I like the texture with the Grimy Black washes, though I'd have to tone them up a bit in color. The Payne's just turned out too blue-tinted.

I decided that I would use some thin luan plywood as a base for this structure; I will use embossed styrene sheet laminated on the edges to simulate a flagstone foundation. The boardwalk in front will be created with stripwood. This way, the structure will be entirely self-contained in case I'd like to use it on another layout; I'm planning on hiding some electronics in it to power a golden-white LED inside. 

The plywood also creates a convincing "floor" for the Cafe, should I decide to create a fully detailed interior. You can also see the roof panels; haven't decided yet to go with Bar Mills shingles, or simulated tar-paper on the roof.


This is turning out to be a fun build! More to follow.


Tuesday, March 17, 2015

Starting on the Cafe

Life has been busy, but I had a chance this week to start on one of the structures that will occupy the small business district on the layout.

This little cafe has existed so far only as a mockup on the layout.


I'm using a Trackside Scenery kit as inspiration for my scratchbuilt cafe.


Originally, my intention was to use styrene construction, just like I did for the depot. However, when I saw the price of a single sheet of clapboard siding ($13!), I took a left turn to the section of the hobby shop that had basswood sheet and strip stock.

I've scratchbuilt with wood before, and have always enjoyed it; not to mention that the raw materials are much more affordable than styrene. For that same $13, I got a pile of stripwood and siding, enough to complete the whole structure.

For me, wood is easier to cut, dress and file than styrene. After some careful measurements, I had the four basic walls cut out:


My structure is a bit wider and shallower than the picture I am working off of. I am using Grandt Line windows and doors, so I dry-fit them to find the best arrangement on the front wall. This arrangement looked a little to "wide spaced" for me:


I moved the windows in about 2 scale feet, and liked that much better. Note the baseline for the window height.

Cutting window and door openings has always been the activity I hate the most about scratchbuilding; mostly because I am a stickler for accuracy. To make sure everything is where it's supposed to be, I carefully drew out guidelines on the back face of the wall, measured with the scale ruler.


Since wood is easier to cut through, I find I can control my blade a bit better and get cleaner door and window openings. I cut them a bit undersize, then file them to fit the part; there's no going back if you cut the opening too large!


Success!

With all the window and door openings cut, I started adding interior bracing, keeping in mind the general concept I have for how the building will assemble. These little mini clamps, found at the 99 cent store, are perfect for clamping small glue joints like this.


That's it so far! I still have more bracing to add; I'd like to err on the side of over-bracing the walls to avoid warping. Stay tuned for the next segment on constructing this little cafe.


Friday, March 6, 2015

Paint Shop

Got a bit of backlogged paint-shop work done.

Whenever possible, I prefer to "spray bomb" with Tamiya or Floquil spray cans, since it's easy to clean up. I try to keep a stock of basic blacks, grays, and flat/glossy finishes on hand in spray cans just so I can slap on a quick coat without worrying about airbrush cleanup.

I used a can of Tamiya Semi-Gloss black (same as on #2's boiler/cab) to paint the final coat on this Shapeways tender:


Next up was to tackle the cartoonishy bright colors on the Mintrains Coaches. The bright green sides and blue-black roofs were way too garish, so I disassembled them for painting.

I used a spray can of Floquil Grimy Black for the roof of each car.


For more specific colors, I have to break out the airbrush. I try to keep my airbrush setup as streamlined as possible, so that I can minimize the amount of tear down and setup I have to go through. My airbrush hangs on a hook right next to my workbench, with the air hose already connected.


The compressor is tied into a surge protector, so all I have to do is flip a switch.


I use a scrap piece of MDF clamped to a portable workmate as my airbrushing station. I arrange it so that the light from the open garage door is coming in from behind me; this way I get clear lighting on the object I'm spraying. Of course, one needs paper towels and water; it would be nice to have a sink in the garage, but I don't, so I keep one cup for clean water and another as a "flush bucket" for cleaning the brush.


I use water-based paints exclusively for airbrushing, just because I prefer the ease of cleanup. I tend to spray around 25 to 30 psi for solid finishes like this. 

I slapped a coat of Pullman Green on the coaches, and I'm really pleased with the color. I think it's a big improvement.


Already these coaches are looking much better. Next step is to clearcoat and decal, then reassemble and give them a light weathering treatment. These will need to be upgraded to Micro-Trains couplers as well.

Thursday, March 5, 2015

So Long, Giant Peanut.

Well, maybe not "so long." More like...see ya later.

Today was clean out the garage workspace day, and I decided to streamline my workflow by removing all projects that do not require my attention. The elephant in the room, so to speak, was the neglected 2x4 benchwork from Marmion Valley V1.0; lovingly christened by my wife, the "Giant Peanut."

The Giant Peanut, with remains of PC Board Ties and Code 55 Rail.
A pair of pliers and a hot soldering iron made short work of the (imperfect) handlaid trackwork.

I'm sure many of us have experienced the same stalled-out project syndrome in this hobby, and it's certainly nothing to be ashamed of. What we are dealing with is essentially an artistic process, and not all artistic ideas come to complete fruition when executed.

For each dusty project, we have a list of things we have learned; things that we have come away from wiser because of trying. In the case of the Giant Peanut, here's mine:

1. The brand of thin CA I used to cement the PC ties down was not strong enough; too brittle, and didn't withstand the heat from the soldering iron. I will stick to liquid nails in the future.

2. Pre-bend curves with a jig or rail bending tool; eyeballing and hand-bending resulted in too many rail kinks.

3. Use flux to ensure strong, even solder joints.

4. Don't use Masonite sub-roadbed until it has fully adapted to the ambient temperature and humidity. After laying rail, I got a multitude of kinks and warps after the Masonite shifted.

5. Slathering giant amounts of Sculptamold all over every inch of the landscape was fun, but not really necessary. Save Sculptamold for shaping countours between foam and roadbed, or for creating rock faces. Use lightweight spackle elsewhere.

6. Very few hills in nature look like a Giant Peanut.

I could go on; but really, this is what this project was about; taking learning steps and using the experience to create a better outcome in the future.

I'm not destroying the Giant Peanut, but it will be stored out of sight for the time being. I am considering using it for an N Scale roundy-round setup; my son is showing more interest in the hobby so this might prove to be a project he might enjoy.

Monday, February 23, 2015

"Paper is cheap..."

"...and studio time is expensive."

The above was a cryptic adage taught to me early on in my music career by one of my first mentors. As I hastily crammed extra measures onto an instrumental part in an effort to save paper, he slung those words at me in an effort to remind me that using more paper and putting the extra effort into preparing the parts well would be a cheaper investment than running the clock out in the studio as the musicians struggled to read the tightly formatted music.

What does this have to do with model railroading?

The adage occurred to me as I created a few cardstock mockups for the MVRR. Paper is cheap, cheaper than styrene, basswood, and Grandt Line castings. What better way to test out the composition and arrangement of structures in a scene than creating some mocked-up buildings as stand ins?


There is a dangerous mentality in this hobby; that is, the idea that if we aren't actually building models or running trains, we are not actually "accomplishing anything." I fall into this trap a lot. I feel rushed to jump into the next project in the race to get the layout finished. I feel like if I don't spen money on materials or kits, I can't do anything productive or enjoyable.

On the contrary, we should relax, take our time, and think about the important decisions with patience and clarity. We can use materials on hand to help accomplish these tasks.

One of the things I want to get better at is composing a scene. When faced with the relatively shallow dimensions of this little layout, it calls for some extra planning to create a believable scene. Before I commit to scratchbuilding structures, I want to see how all the elements will work together in the scene, and how the topography will help contribute to the overall composition of sight lines, sub-scenes, etc.


We start with our little depot, which is almost finished, but has a paper stand-in as I test out the position and placement of the platform. This is the alignment I like best, though it does have the drawback of crossing over the joint in the modules. I'm trying to avoid having elements overlap the joint. One idea would be to eliminate the longer tail of the platform all together.

I intend for the platform to cross over the tracks, to allow scale passengers to cross between them.


Here is a good example of a "pondering spot", as I haven't really decided what kind of industry will occupy this spur. I haven't even tacked down the spur yet. Right now, the mockup is holding place as a generic freight warehouse of some type. It's also conceivable that a second industry could occupy the south side of the spur, since this track can hold two car spots.


Here is an area where I want to introduce some "verticality" to the layout of the buildings. Imagine the road (center bottom of photo) crosses the tracks, then splits in a "T"; the right turn heads to the depot and the freight house, while the left road crosses in front of the hotel and cafe, climbing gently up the hillside until it crosses over the railroad tracks on a timber bridge or stone viaduct.

The hotel and cafe would be "built into a hillside," so to speak, as the topography gently rises towards the left side of the photo. This gives the right-of-way a convenient "exit point" under the overpass, since I intend the rear track to be hidden behind the ridge/treeline at the back of the layout.

I could also see the cafe and hotel swapping places, which would accentuate the rise of the hill; however, in its current place, the hotel serves as an added viewblock on the lower-level topography. Both buildings are of the "false front" variety, with either board-and-batten or clapboard siding.

Making these mockups was simple with a scale ruler, pencil, a sharp xacto and some cardstock I had on hand. It's an enjoyable and quick way to start composing the idea scene.