Tuesday, September 30, 2014

New Workbench

In a fit of spring-cleaning (at the beginning of fall, no less!), I attacked the train-space in the garage yesterday. I quickly realized what I have been missing in my workflow all this time; a workbench. The goal became to create a central, well organized, well-lit area for my projects.

I already had some stacking storage drawers under my N-scale shelf layout, and after some creative thinking I figured that I could fit a workbench under the layout, between the storage drawers and the shelf. A quick trip to the big-box store yeilded a few 1x4's and 2x4's, as well as a 2'x4' 1/4" MDF panel to serve as a smooth, solid bench-top.

I built a box-frame with the 1x4's, and used the 2x4's as legs. 1x4 sway bracing was added to the back of the table; the whole unit is sturdy enough that it didn't need side-braces. Here's how it all fits together; you can see the Marmion Valley layout nestled in its little storage nook next to the workbench:


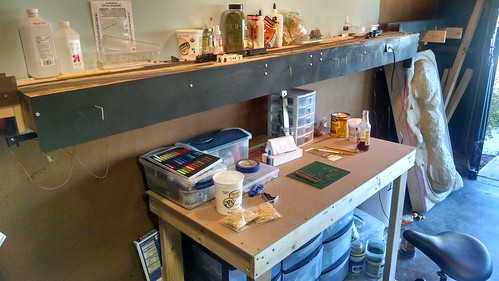
The layout lights are above my head when sitting at the workbench, so they provide a lot of workable light. I might add another desktop light as well. I'm also going to hang a power-strip on the side of the workbench so that I can plug in my Dremel, soldering iron, bench grinder, and other sundry tools.

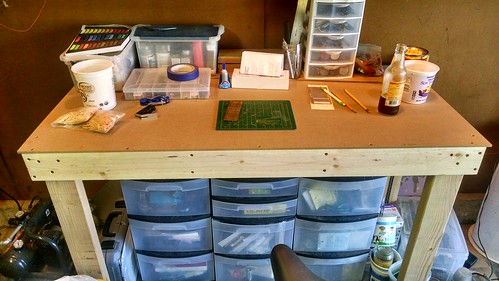
I dry-screwed the MDF top on, so that it can be replaced periodically once it gets too pock-marked, paint-stained, and solder-burnt.


Having a well-organized workspace really inspires you to get out and work on your projects. Plus, a cold Newcastle can't hurt either.


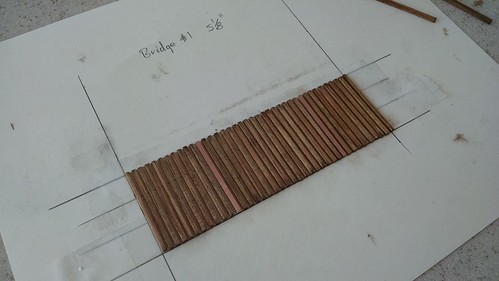
Looking forward to sharing the new projects this workbench will harbor!

Tuesday, September 23, 2014

Landforms, Sculptamold, Cabeese and Weathering

A busy few days around the workshop. I have finally finished contouring the landscape, and applied the first initial coat of Sculptamold to the layout.


This is definitely an area where I have a bit of a learning curve. Visualizing and then executing the land contours in 3D proved to be a bit of a frustrating and painstaking excercise. However, I was more pleased when I started to blend the landforms together with Sculptamold.


The landforms will get a heavy sanding with 50 grit sandpaper, and then a "patch coat" of Sculptamold to clean up any big gaps or bubbles in the texture.

I am discovering more and more that working in HOn30 is giving me an opportunity to really stretch my modeling skills and explore projects that push my comfort zone. This Funaro & Carmelengo resin caboose kit is no different; this is my first resin kit, and, much as the Toma kit did, it is proving to be a bit of a learning curve. I have seen resin kits like this described as a "scratchbuild in a box," and I certainly can relate. I am about halfway through this kit, and am plugging along steadily. 


I am having trouble getting the nylon string on the underbody to the right tension. It just looks "slack" to me, and doesn't have the right-angles that it needs for the correct look.


Additionally, my drilling for the wire handgrabs was a bit imprecise, so you can see minor imperfections in alignment.


Being somewhat of a perfectionist, this bothers me a bit, but it really is something I can live with and learn from for next time. Must get some newer, sharper bits for my pin vise next time.

However, I am quite proud of how #2 is coming along. She was dullcote-d for "tooth" and given an initial coat of weathering with artist's pastels:


I have to decide how to seal this coat of weathering (Dullcote spray-bombing seems to obliterate it), and then I'll do more specific "spot weathering" with rust/grease etc., as well as some drybrushing to pick out some highlights.

All in all, I think that I am enjoying the "roll-your-own" nature of working in HOn30 so far. It really is addicting, in its own way. Once you get a model to a certain level of completion, there is a lot of satisfaction gained.

Thursday, September 11, 2014

Taking the leap...handlaid track begins!

I decided to take the leap and get the ball rolling on handlaying the track. The ties were already in place on the masonite roadbed, so I began by soldering lengths of Code 55 rail together two at a time. These double lengths of rail are easier to bend smoothly through long sections of curve.


Straight sections are fairly easy to lay, though it can be challenging to keep them truly "straight." Luckily I'm modeling a more rural, backwoods operation :-)


Using my combine as a test car:


In the above shot, you can see we will soon be needing some bridges. I love scratch-building with scale lumber; perhaps it's a hold-over from my 1:1 world interest in woodworking. I decided I would draw out a quick template and construct the deck of the bridge out of stained scale basswood. The stain I used was Minwax "Special Walnut," which came out a bit too yellow-y. I'm probably going to end up toning things down with an india ink wash, or some chalks/pastels.

Here's the ties on the template, stuck down using double-sided tape. I am building the deck face-down, and the stringers will hold everything together. You can see the two PC board ties in there; I realized too late I made the error of not gapping them before installing! Whoops!


Found several bags of these mini-clamps at the 99 cent store; they are perfect for applications like this.


As I progress on the track laying and bridge building I will post more. Hopefully a video of the first run will be up soon! Huzzah!