Tuesday, December 30, 2014

A new design concept

I hope everyone had a nice Holiday season...one of the gifts I received was a book by Ian Rice called "Small, Smart, and Practical Track Plans." Many of his unique ideas about planning for small spaces really struck home with me. Track plans aside, the concepts and execution behind his designs really sparked my imagination.

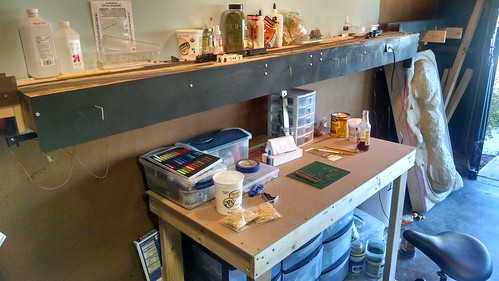
One of his design axioms really hit home; namely, plan to have the layout in a place where it will be easily accessed and used. I think one of the reasons I have had such a dry spell working on my current 2x4 layout is the fact that I need to go out to the garage, clear a space and prop the layout up on a table to even start working on it.

So, I've decided to take a crack at designing a micro-layout version of the Marmion Valley that will sit atop an IKEA "expedit" bookcase in my office.


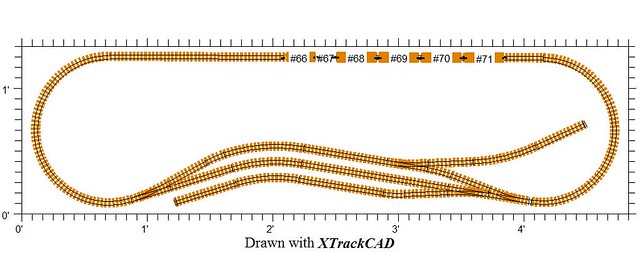
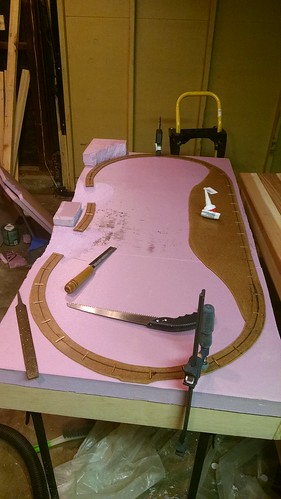
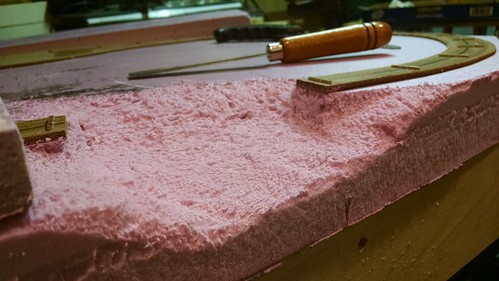
The Expedit (on its side) gives me 16" of depth and about 58 3/4" of length to work with. I wanted a continuous run, a passing track, and the opportunity to have a bit of light switching. 

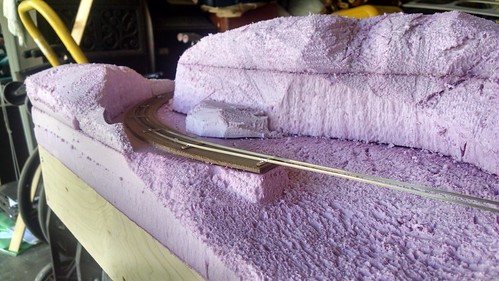
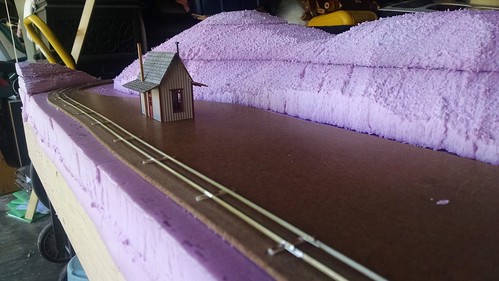
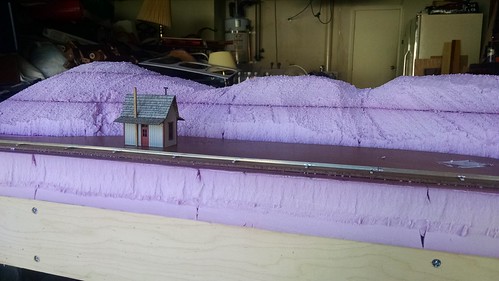
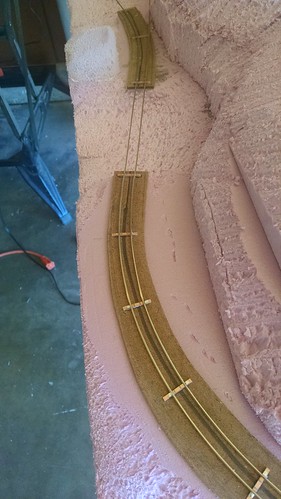
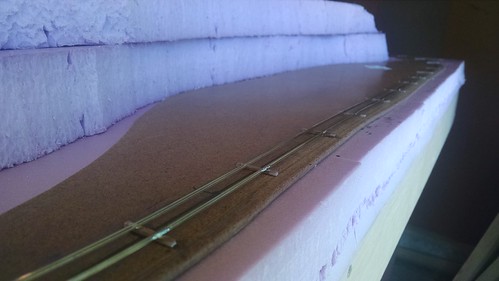
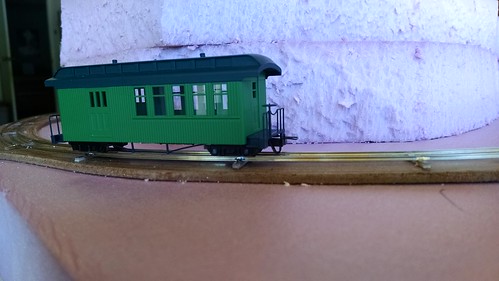
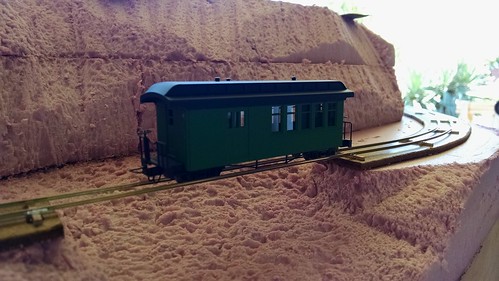
The long tangent track in the back of the layout will be hidden by a low ridge/treeline. You'll note that visible track is intentionally sweeping/curved to help lead the eye into the scenes; a trick that will help the layout appear larger than it really is.

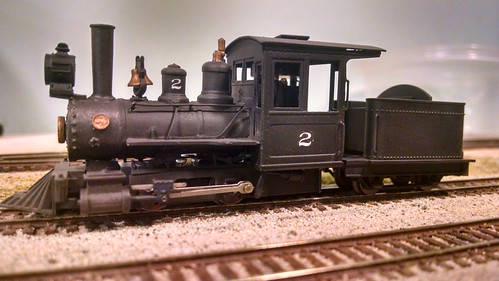
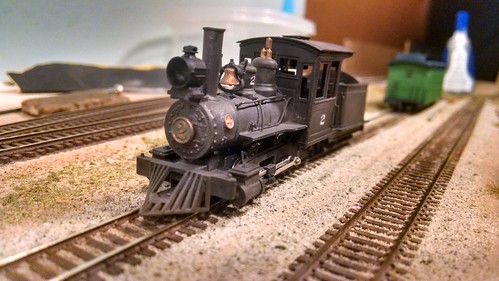
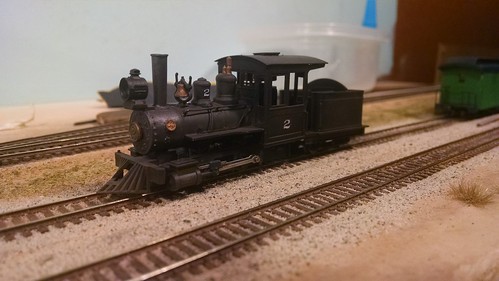
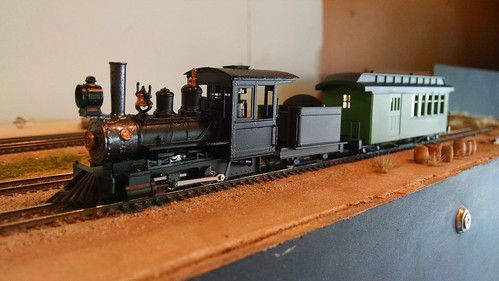
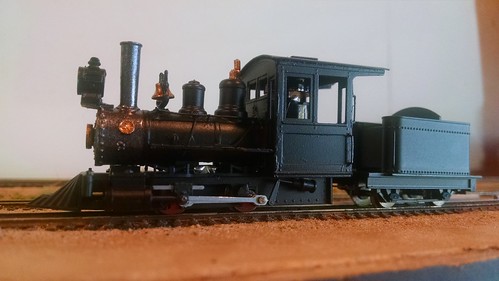
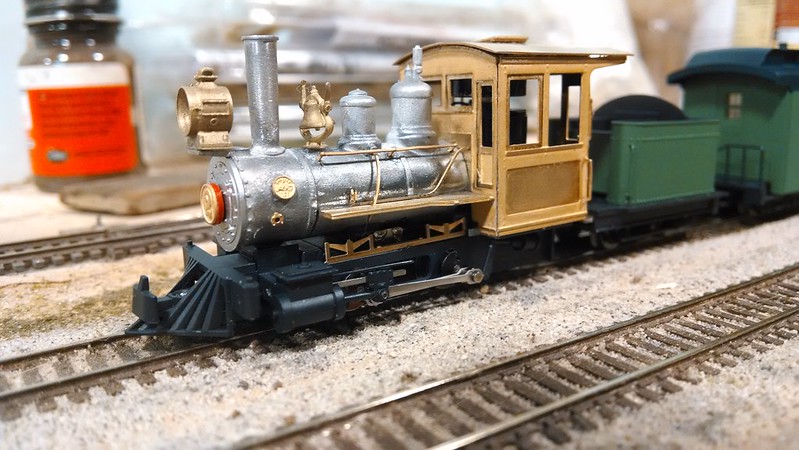
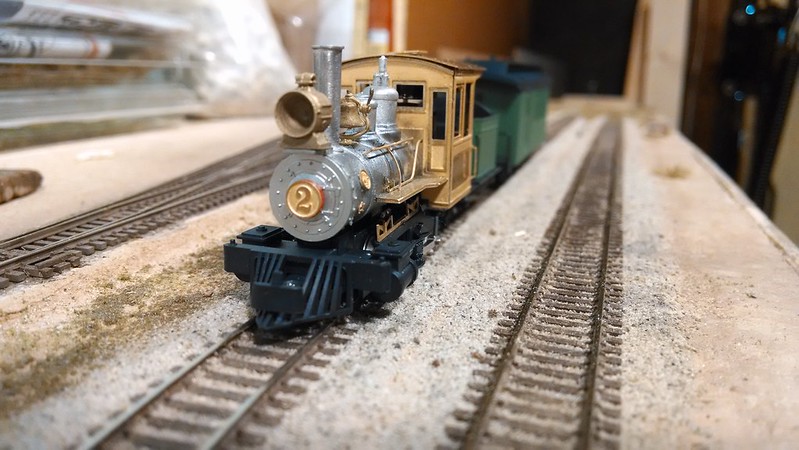
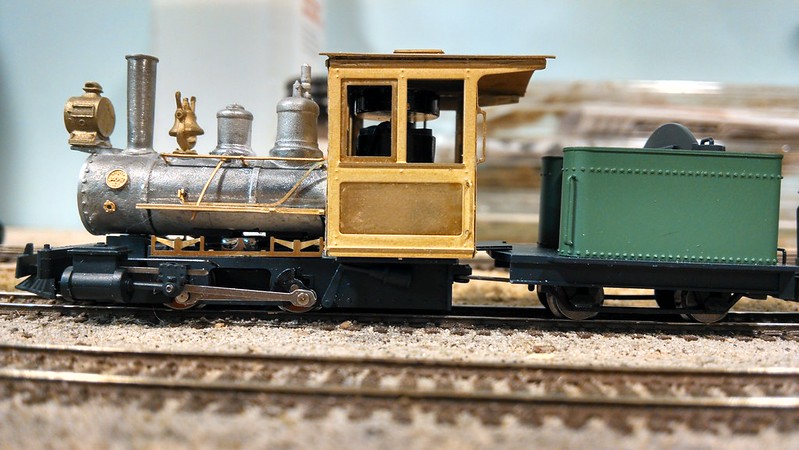
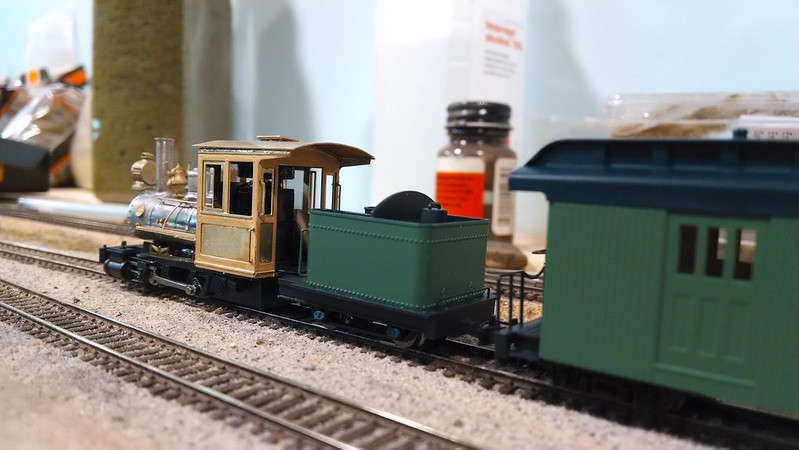
The 7" radius is tight, but not unheard of in the world of micro-layouts. More importantly, it's well within the operating range of my little 0-4-0, as evidenced by this YouTube video of the same set navigating Tomix 103mm (4"!!!) curves:


I'm considering abandoning handlaid track in favor of Peco's bulletproof HOn30 line. The code 80 rail profile is a drawback, but I could live with it. I'd still handlay my own #5 turnouts. 

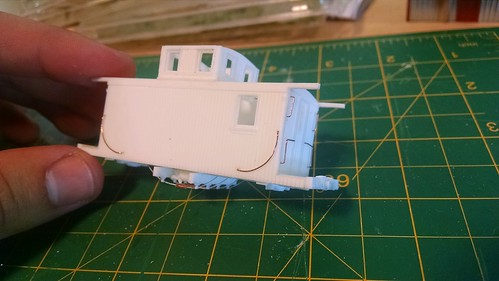
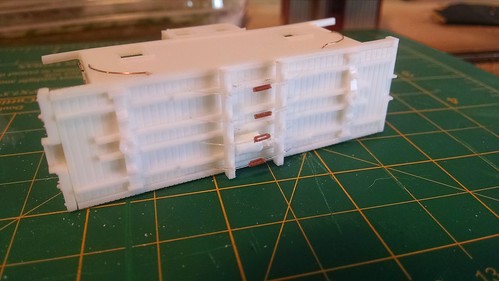
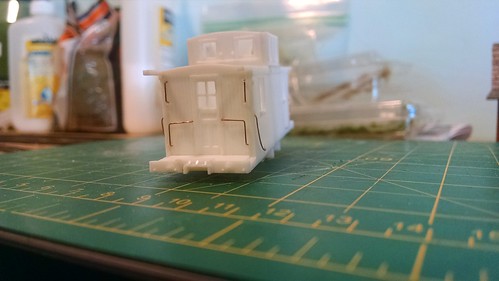
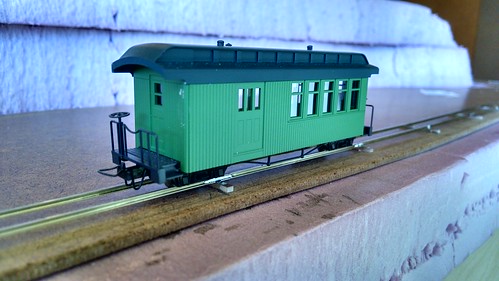
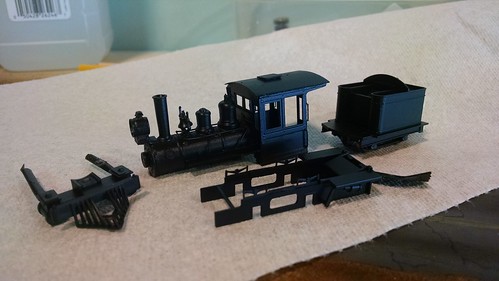
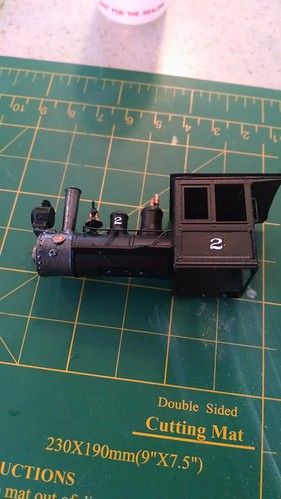
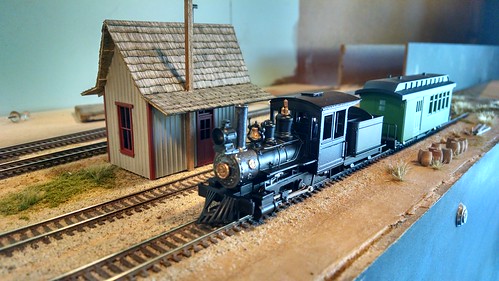
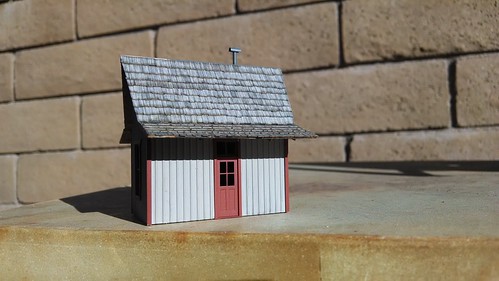
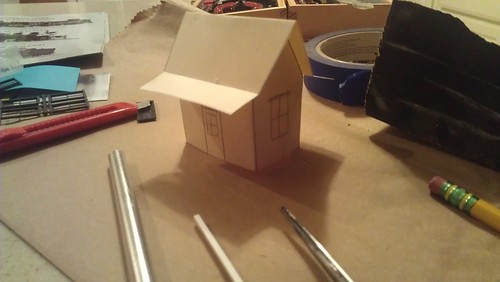
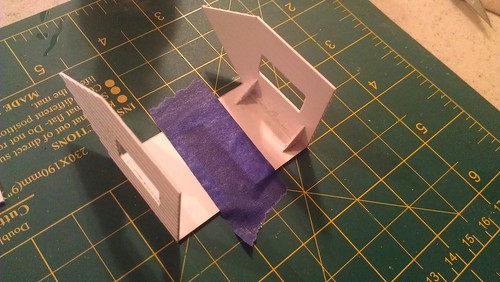
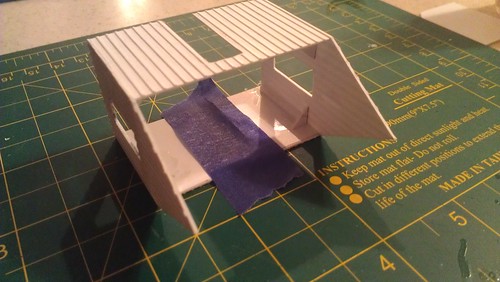
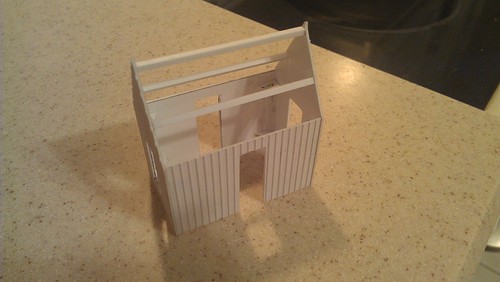
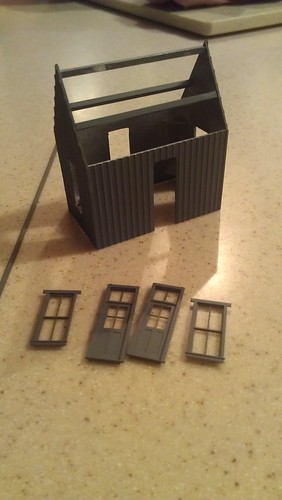
The little depot I scratchbuilt will have a home on this layout, as will a number of other "railroady" structures like a small water tower, coal bunker, freight house, etc. 

I'm still tossing around ideas for the industry that will occupy the middle spur. I'm leaning towards a stock pen at this point.

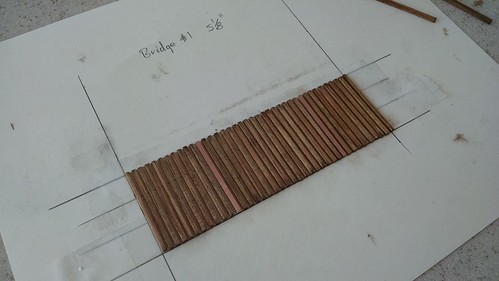
Most likely, this will be constructed in two 29" modules to allow for easy tuck-away storage and transport if needed. Ideally, I will stain the fascia to match my bookcase for a very clean, tidy presentation; DC control could be built into the fascia as well. It would be fun to exhibit this layout at shows; while that was originally a plan in my mind for the 2x4 layout, it still isn't as eminently portable as a set of small modules would be. 

I'm excited about this idea; I wouldn't be abandoning the 2x4 layout altogether, but I think this little micro will be an attainable goal in the interim.

Tuesday, September 30, 2014

New Workbench

In a fit of spring-cleaning (at the beginning of fall, no less!), I attacked the train-space in the garage yesterday. I quickly realized what I have been missing in my workflow all this time; a workbench. The goal became to create a central, well organized, well-lit area for my projects.

I already had some stacking storage drawers under my N-scale shelf layout, and after some creative thinking I figured that I could fit a workbench under the layout, between the storage drawers and the shelf. A quick trip to the big-box store yeilded a few 1x4's and 2x4's, as well as a 2'x4' 1/4" MDF panel to serve as a smooth, solid bench-top.

I built a box-frame with the 1x4's, and used the 2x4's as legs. 1x4 sway bracing was added to the back of the table; the whole unit is sturdy enough that it didn't need side-braces. Here's how it all fits together; you can see the Marmion Valley layout nestled in its little storage nook next to the workbench:


The layout lights are above my head when sitting at the workbench, so they provide a lot of workable light. I might add another desktop light as well. I'm also going to hang a power-strip on the side of the workbench so that I can plug in my Dremel, soldering iron, bench grinder, and other sundry tools.

I dry-screwed the MDF top on, so that it can be replaced periodically once it gets too pock-marked, paint-stained, and solder-burnt.


Having a well-organized workspace really inspires you to get out and work on your projects. Plus, a cold Newcastle can't hurt either.


Looking forward to sharing the new projects this workbench will harbor!

Tuesday, September 23, 2014

Landforms, Sculptamold, Cabeese and Weathering

A busy few days around the workshop. I have finally finished contouring the landscape, and applied the first initial coat of Sculptamold to the layout.


This is definitely an area where I have a bit of a learning curve. Visualizing and then executing the land contours in 3D proved to be a bit of a frustrating and painstaking excercise. However, I was more pleased when I started to blend the landforms together with Sculptamold.


The landforms will get a heavy sanding with 50 grit sandpaper, and then a "patch coat" of Sculptamold to clean up any big gaps or bubbles in the texture.

I am discovering more and more that working in HOn30 is giving me an opportunity to really stretch my modeling skills and explore projects that push my comfort zone. This Funaro & Carmelengo resin caboose kit is no different; this is my first resin kit, and, much as the Toma kit did, it is proving to be a bit of a learning curve. I have seen resin kits like this described as a "scratchbuild in a box," and I certainly can relate. I am about halfway through this kit, and am plugging along steadily. 


I am having trouble getting the nylon string on the underbody to the right tension. It just looks "slack" to me, and doesn't have the right-angles that it needs for the correct look.


Additionally, my drilling for the wire handgrabs was a bit imprecise, so you can see minor imperfections in alignment.


Being somewhat of a perfectionist, this bothers me a bit, but it really is something I can live with and learn from for next time. Must get some newer, sharper bits for my pin vise next time.

However, I am quite proud of how #2 is coming along. She was dullcote-d for "tooth" and given an initial coat of weathering with artist's pastels:


I have to decide how to seal this coat of weathering (Dullcote spray-bombing seems to obliterate it), and then I'll do more specific "spot weathering" with rust/grease etc., as well as some drybrushing to pick out some highlights.

All in all, I think that I am enjoying the "roll-your-own" nature of working in HOn30 so far. It really is addicting, in its own way. Once you get a model to a certain level of completion, there is a lot of satisfaction gained.

Thursday, September 11, 2014

Taking the leap...handlaid track begins!

I decided to take the leap and get the ball rolling on handlaying the track. The ties were already in place on the masonite roadbed, so I began by soldering lengths of Code 55 rail together two at a time. These double lengths of rail are easier to bend smoothly through long sections of curve.


Straight sections are fairly easy to lay, though it can be challenging to keep them truly "straight." Luckily I'm modeling a more rural, backwoods operation :-)


Using my combine as a test car:


In the above shot, you can see we will soon be needing some bridges. I love scratch-building with scale lumber; perhaps it's a hold-over from my 1:1 world interest in woodworking. I decided I would draw out a quick template and construct the deck of the bridge out of stained scale basswood. The stain I used was Minwax "Special Walnut," which came out a bit too yellow-y. I'm probably going to end up toning things down with an india ink wash, or some chalks/pastels.

Here's the ties on the template, stuck down using double-sided tape. I am building the deck face-down, and the stringers will hold everything together. You can see the two PC board ties in there; I realized too late I made the error of not gapping them before installing! Whoops!


Found several bags of these mini-clamps at the 99 cent store; they are perfect for applications like this.


As I progress on the track laying and bridge building I will post more. Hopefully a video of the first run will be up soon! Huzzah!


Friday, August 22, 2014

Some wrongs can be righted

Attempt #1 at painting my beloved little 0-4-0 was not a success.

The primer was "OK," at best. I went ahead and loaded up my airbrush with thinned flat black enamel, ready to spray the base coat.

Ready...aim...fire!

A splattery mess slopped onto the little loco frame I had spent HOURS working on. Strange cobweb-like fuzz started to form over the messy, blotchy paint coat. My heart felt like it was sinking.

Luckily, some wrongs can be righted. After some agonizing on an online forum, it was suggested I soak the whole thing in 91% rubbing alcohol and go at it with a toothbrush and Q-tips. Not only did this clean up the messy paint, it stripped the less-than-adequate primer job and also removed the factory paint from the frame and cowcatcher. I was back at square one, ready to start afresh.

~~~~

This time I used a big rattle can of Rustoleum 2-in-1 Primer as my base. Really nice, even coat, and a tough grip on the brass and white metal parts.

Next, I decided to eschew the airbrush in favor of Tamiya rattle cans. The first coat of black:


Looking much better now! The next day, I started filling in details with graphite (Tamiya "Gunmetal") and Brass (Testors), as well as adding some decals.


Now THAT'S more like it! The moral of the story? Don't lose hope in the face of disaster...you can often find a way to salvage your mistake.

I will leave you with a tempting little preview of a future scene on the layout...Our 3/4 completed depot with 3/4 completed #2 posing in front.


Wednesday, August 20, 2014

Layout update, 8-20-14

Some progress has been made on the layout! Roadbed, frame, and pink foam have been mated together.


I have been making some first attempts at creating some contours to the ditches and valleys on the trestle/bridge side of the layout. This is messy work using a rasp! I'm trying to go slow, and visualize what will look natural and logical. 


Creating a small "fill" area for a bridge abutment is necessary to give the impression that the bridge was actually built into the topography.


Here's how our little depot stands, as of today:


I really like the look of the Grandt Line shingles, a nice dimensional texture on the roof. Can't wait to get the train-order signal built and installed! It will really give this structure that "uber-railroady" feeling.

I had a bit of a disaster in my first attempt at painting #2, my 0-4-0. Suffice to say that my airbrush and the paint I chose were not playing nice with each other. I'm in the process of stripping everything to give it another go; I've spent a lot of time (and $$!!) on this little loco kit, and I want to do everything right. 

Thanks for looking!

Tuesday, June 17, 2014

Engine #2...ready for the paint shop

I finished the detail work on the Toma Model Works body kit this morning, and matched it to the F&C 0-4-0 chassis. This is a fairly advanced level kit, and the first brass/white metal kit I have attempted. It definitely pushed my skills, and I learned a lot in the process.

Here she is posing on my N scale layout.


She is not without her rough edges...like I said, there are a few things I would do differently next time. However, I am looking forward to cleaning her up a bit and getting her ready for a few coats of paint. Engine and tender will receive basic steam-engine black, with a graphite smokebox.

Monday, June 16, 2014

Inspirations

Narrow Gauge railroads have been an increasing interest for me as late; hence the inception of this layout. I thought I'd share a few of the photos I have found online that serve as inspiration for my endeavors.

The following are a few shots of the Pacific Coast Railway, a 3' gauge line that ran between Pismo Beach and Los Olivos many years ago. This is very much the "flavor" I am trying to capture with my fictional line; single-track, meandering right-of-way through lush hillsides, mixed trains, oak trees, and trestles.


There is also a hefty dosage of inspiration from the famed Maine 2-footers like the Sandy River & Rangely Lakes; especially the diminutive nature of the equipment.


As you can see in the last photo above, narrow gauge railroading really helps you pull in the chicks.

Saturday, June 14, 2014

A Depot for the MVRRy

While I await delivery of ties to start laying rail, and detail parts for my 0-4-0, decided I would start working on the depot.

Here's the inspiration: the Scale Model Masterpieces shortline depot. You can see the resemblance of this to the little sketch I did for this Blog's logo. This station has the perfect "look" for my little layout, and the train-order signal fairly screams shortline railroad. However, I didn't want to spend $60 on the kit; and I wanted to change the stone construction to board and batten. Scratchbuild!


Using a scale ruler and some cardstock, I made a paper mockup to get the dimensions I wanted. I went through a few iterations to get the ratio just right. There is something relaxing about free-styling with some cardstock, a pencil, and a ruler; it's arts & crafts all over again.


Then, I started cutting and assembling the walls, using measurements from the cardstock model as a dimensional guide.


As you can see, I use painter's tape to secure one of the walls as I carefull attach the others. 90 degree braces are formed from the corners of the scrap pieces, and they help shore up the walls.

The final wall assembly, with primary rafter supports installed.


The walls, trim, and doors/windows were spray-bombed with cheap grey Krylon primer.


I realized after spray-bombing that I still need to cut pockets in the long walls for the angled 2x6 rafters that will support the eaves. I ordered those, a train-order signal kit and some shake-shingles today.

Now, to decide on a color scheme. I've always been partial to AT&SF style off-yellow and green, but I'm thinking of going in another direction with this one, maybe grey and maroon.

As I progress further, I'll post more step-by-step construction photos. I hope this inspires you to try scratchbuilding a project of your own.